Server Setup on VPS
Setting up a server
Basics of setting up the server application This guide assumes you are hosting a server on a VPS with a Management panel For an in-depth guide regarding hosting a server at home, visit How to create a aserver.
Overview
Creating a Home Server is free, hosting one with a VPS is easier and more secure
Servers are an integral part of BeamMP; players are connected to each other through the server. They run natively on Windows and Linux.
You can make private servers, which only people you invite can join, or public servers, which will show in our official server list.
Getting a server up and running is a process of a few steps! If you run into any issues, feel free to ask on our Forum or on our Discord server in the #support channel. Also refer to the Server Maintenance section for more info.
Please make sure to read the LICENSE of the server before use.
Info
Hosting a server using a VPS, does not require any firewall or port forwarding changes to your router.
If you haven't chosen a VPS to host your server on yet, check out our Partnered Hosting Services (paid):
Partnered hosting services
- Horizon Hosting
- RackGenius
- Connect Hosting
- Assetto Hosting
- ZAP-Hosting
- HostHavoc
- PedalHost
- Vyper Hosting
- BisectHosting
- Four Seasons Hosting
- Vertuo Hosting
- Winheberg
- Wabbanode
- Iceline Hosting (We take no responsibility for any content on any externally linked services or websites.)
1. Setting up the VPS
First, you need to make sure that your Server management page is reachable. Once you verified that the Server is ready for operation, proceed to step 2.
2. Obtaining an Authentication Key
The “Authentication Key”, often called “AuthKey”, is necessary for making a public server accessible by the serverlist. Though it is recommended to add the authkey to private servers as well. You have a limited number of keys. One key can be used on one server at a time, so you cannot start two servers at the same time with the same key. More keys can be obtained by supporting the project. Read this article for more information.
Warning
DO NOT EVER SHARE THIS KEY OR SHOW IT TO ANYONE. TREAT THIS LIKE A PASSWORD.
You will need a Discord account for this step. This is necessary to prevent spam.
2.1. Accessing the keys page
Login with Discord to the Keymaster. From the Keymaster homepage click on "Keys" on the left of the screen:
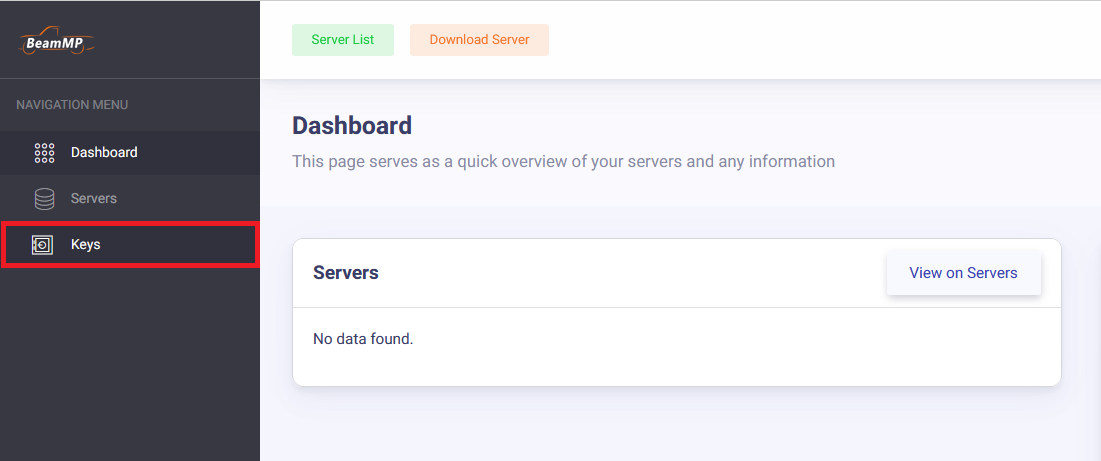
2.2. Creating a key
To create your key, click on the green "+" button in the top right.

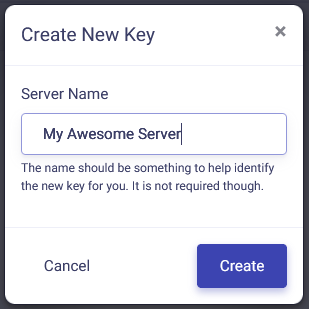
2.3. Filling out the key information
Next, fill out the Server Name field (this is just the keys name and not the actual name of the server on the list), then click "Create". Example:
It should, in the end, look something like this:

2.4. Copying the key
Now copy the text in the “Key” field, in this example that is 3173a2e-6az0-4542-a3p0-ddqq5ff95558 and hold onto it for the next step. You can do this by clicking the clipboard on the right of the key:

Warning
You will not be able to edit the ServerConfig.toml file directly in the File Manager. This is intentional to enforce e.g. player limits by the hosting company.
3. Populating the fields
The hosting panel will feature a few fields to enter something into. Some fields may be marked with "*", which means they are mandatory to fill out. With the authkey in your clipboard, find the "Authkey" field on the management panel to paste the key into. Give your Server a Name and description as well! For customization of such in the form of colors and more, refer to this section on Name customization on the maintenance page.
3.1. Validation
Now run your server, and see if it spits out any more [ERROR] or [WARN] messages. The server should stay up now. In the following steps below you can find out how to join the server and add mods.
4. Adding mods to your server
You may add mods to your server using the provided file manager.
Vehicle mods and map mods are different to install, but both require you to put them in your server's (Resources/Client) folder. Simply slide any mod you want to add in that folder.
Warning
Mods can be, and/or become incompatible with BeamNG, BeamMP or even other mods. Start removing mods if you are encountering issues. Should you receive a "done" or "start" message when trying to join your server after adding mods, you likely added an incompatible or broken mod to your server. Mod incompatibilities can also occur between 2 or more mods. If you have client mods installed, check this guide about removing mods from your game.
4.1 General Mods
If you only wanted to add modded vehicles, you simply put the zip file of the mod in the Resources/Client folder. They will automatically be downloaded by anyone who joins your server.
4.2 Maps
All default maps (maps which aren't mods) work out-of-the-box and do not have to be installed. You simply change the Map path in the Map field of the management panel to any of these. For any other modded maps, do this:
- Place your map's
.zipfile in your server's (Resources/Client) folder. - Next, have a look inside the map's zip file (don't extract it) and open the
levelsfolder. In this folder there should be simply one other folder with the name of the map, for example “myawesomedriftmap2021”. Make sure to copy or remember this name exactly as it is written in that folder's name. - Open your management panel. In the
Mapfield, you should see/levels/MAPNAME/info.json, whereMAPNAMEis likely something likegridmap_v2. You want to now replace thisMAPNAMEwith the name of the folder from the last step, in that example it wasmyawesomedriftmap2021. In the end it should look like this (for this example) and should have/info.jsonat the end.
Now, when someone joins your server, it should download the map automatically and work as expected.
If this does NOT work, install the map in your singleplayer BeamNG.drive, launch it and enter the map. Then, open the Console by pressing the ~ (tilde) key (if you're on a non-US keyboard, look at the Toggle System Console action in the Options > Controls > Bindings menu, under the General Debug section), and run print(getMissionFilename()). This should then show you the name to use.
That's it! Your modded map should now be available to join!
5. How to join your server
How you and other players can join your server.
6. Joining your own server (both private and public)
You can direct connect to the pubblic IP and Port of the server, found on the management panel. The same IP and Port have to be entered by any other users trying to connect to this server.
You can also check the Keymaster Website for the Servers IP Address.
To join your public server they can simply go to the server list, type the name of the server, and click connect. If you are unsure of what your server name is, it will be the name you put in the ServerConfig.toml.
Make sure search filters are disabled and the Map set to "Any" if you can't find it.
Should you or your friends experience a "Connection Failed!" Error, check the Launcher Window for codes like 10060, 10061, 10030. This means the server is unreachable, or you entered incorrect parameters into the IP and Port field on your client. IPv6 Support is NOT yet implemented.
Still facing issues?
Open a Thread on the Forum or file a Server Support Ticket on our Discord server in the #support channel.